


 Print
Print
- User manual
- » Organisation account
- » Structure
Structure
If you are the main supervisor of the organisation account, you have access to create the structure of the organisation’s project sites. There are two levels of project sites, and you define the project sites in units and subunits. The project sites shows in the application form in Prisma where the applicant can select a unit and a subunit. Prisma distributes the applications of the organisation to the project sites in the structure.
You can mirror the structure from the organisation structure to the responsibility areas for signing and reporting in Prisma. There are also settings for automatic distribution of the applications, to the units and subunits of the responsibility areas for signing and reporting.
General information on the structure of the organisation
An example of the structure of applications and grant, in an organisation
The structure of the organisation controls which project sites the applying researchers can select in the application form. Two levels of units define the structure and the structure is a tool for the organisation to manage the applications in Prisma. Only the main supervisor of the organisation has permission to create and edit the structure of the organisation.
The responsibility areas for signing and reporting in Prisma can mirror the structure from the organisation structure. When you choose to mirror the structures, the units for the responsibility areas are identical to the organisation structure.
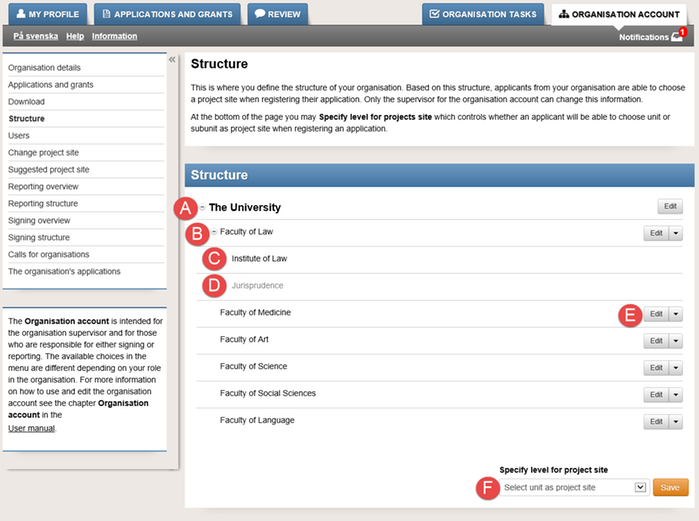
(A)
(B)
(C)
(D)
(E)
(F)
The name of the organisation is copied from the information in ORGANISATION ACCOUNT.
The first level of the units – the unit of the project site.
The second level of the units – the subunit of the project site.
The inactivated unit does not show in the application form.
Edit the name on the unit, or add subunits, by clickning the button Edit.
If you are the main supervisor of the organisation account, you can select the levels of units that will show in the application form.
- Select unit as project site
- Select subunit as project site
- Select unit or subunit as project site
Create the structure for project sites
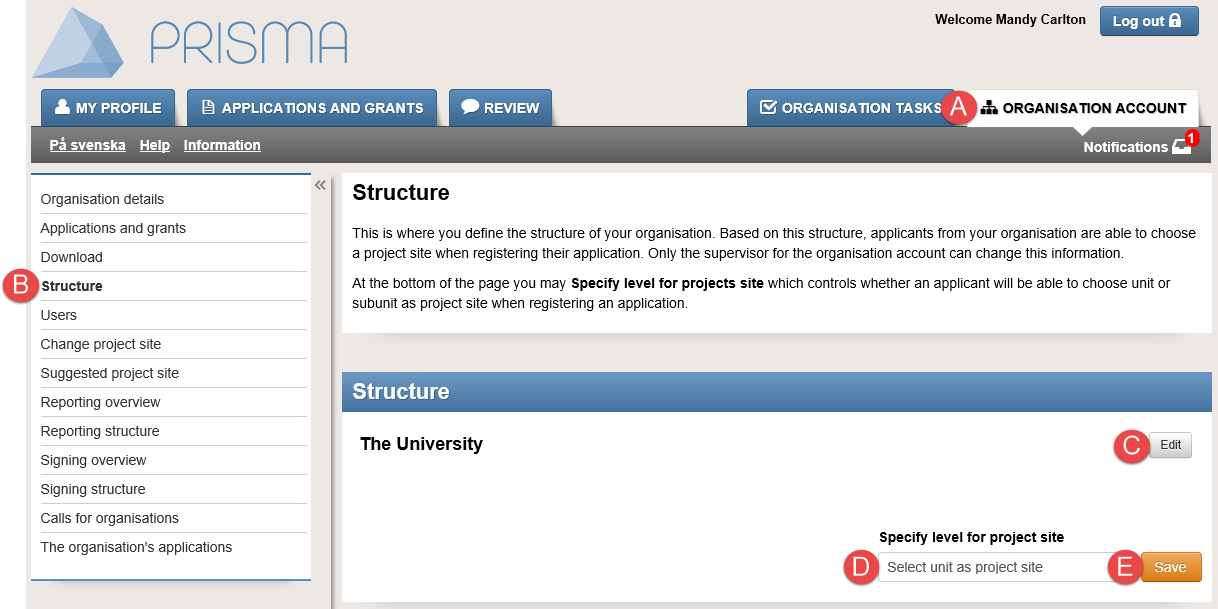
Start creating the structure for your organisation
Before you create the structure of the organisation, you should adjust the settings for mirroring and automatic distribution.
- Log in to your Prisma account.
- Click on the tab ORGANISATION ACCOUNT (A).
- Click on Structure (B).
- Click on Edit (C) to add units, learn more on how to add units below.
- Select how many levels of units the application form will show in the dropdown list Specify level for project site (D).
- Click on Save (E).
Learn more on units and subunits in Project site.
Learn more on mirroring and automatic distribution of applications and grants in Settings.
Add a unit
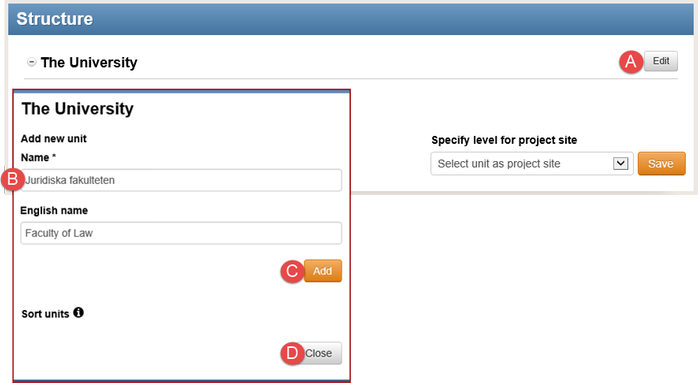
The first unit in the structure of the organisation
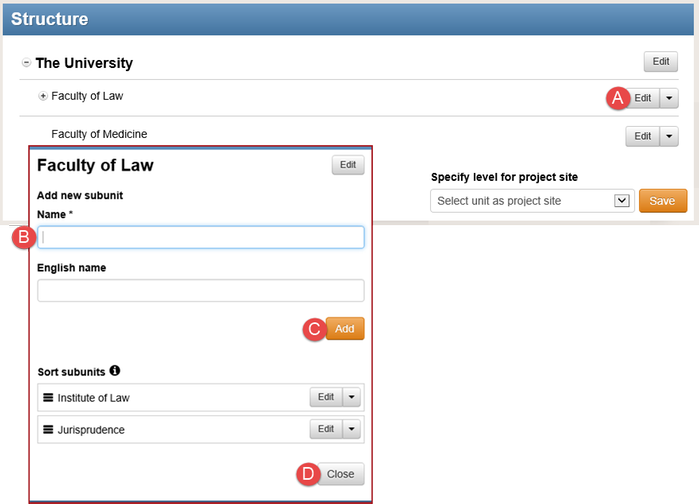
- Follow the instructions 1 - 3 in Create the structure for project sites.
- Click on Edit (A).
- Enter Name (B) in the second window.
- Click on Add (C).
- Click on Close (D).
Continue adding units in the second window. Enter the name on another unit and click on Add (E) for each new unit before you close the second window, see picture below.
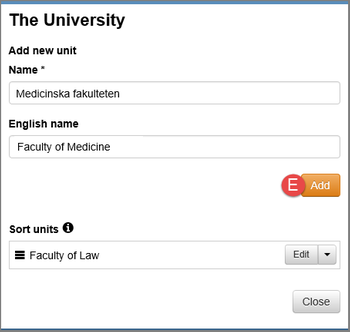
You can add one or several units
Add a subunit
You can add one or several subunits
- Follow the instructions 1 - 3 in Create the structure for project sites.
- Click on Edit (A).
- Enter Name (B) in the second window.
- Click on Add (C).
- Click on Close (D).
Continue adding subunits in the second window. Enter the name on another subunit and click on Add (C) for each new unit before you close the second window.
Edit units and subunits
Edit a unit in the structure
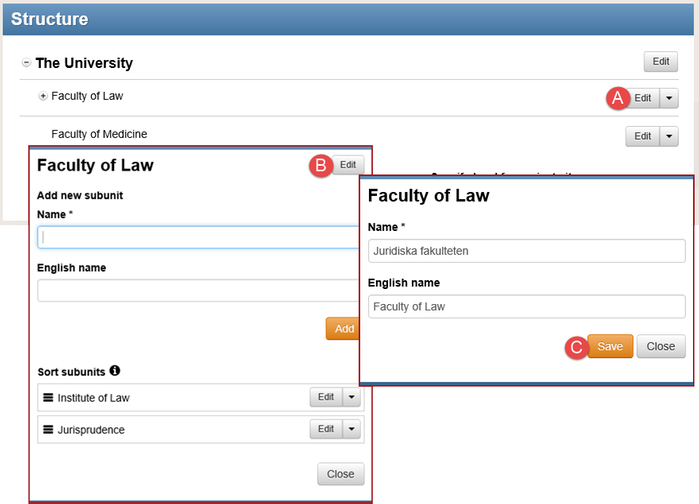
- Follow the instructions 1 - 3 in Create the structure for project sites.
- Click on Edit (A).
- Click on Edit (B) to edit the unit in the second window.
- Edit the name and click on Save (C).
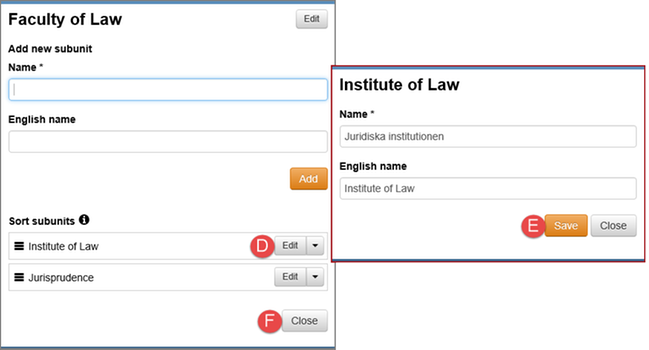
Or, if you want to edit a subunit: - Click on Edit (D) on the row of the subunit you want to edit.
- Edit the name and click on Save (E).
- Click on Close (F).
Edit a subunit in the structure
Sort units and subunits
The picture shows how to sort a unit using "drag-and-drop"
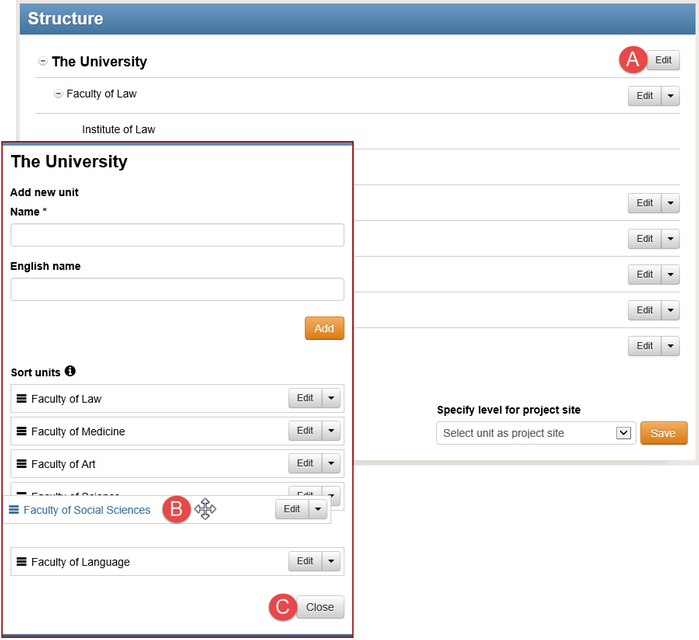
- Follow the instructions 1 - 3 in Create the structure for project sites.
- Click on Edit (A).
- Click on the unit you want to sort and hold the mouse button (B).
- Drag the selected unit and release the mouse button where you want to place the unit.
- Click on Close (C).
Inactivate units and subunits
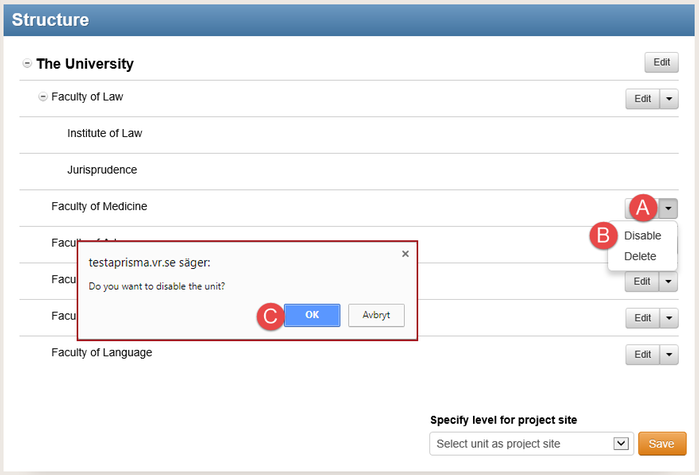
The picture shows how to inactivate a unit
You can only inactivate a unit or a subunit, if there are no applications or tasks in the folder or the subfolder. When you inactivate the unit or the subunit, it is no longer available for the applicant to select when they register the application.
- Follow the instructions 1 - 3 in Create the structure for project sites.
- Click on the arrow next to Edit (A).
- Select “Inactivate” (B) in the drop-down list.
Or, if you want to inactivate a subunit: - Click on Edit (A) on the same row as the unit and then click on the arrow next to Edit in the second window showing the subunits.
- Select “Inactivate” in the drop-down list at the subunit you want to inactivate.
- Click on OK (C) in the message box.
An inactivated unit or subunit, has the option ”Activate” in the drop-down list. Follow the instructions above and select “Activate” from the drop-down list, to activate an inactivated unit or subunit.
Remove units or subunits
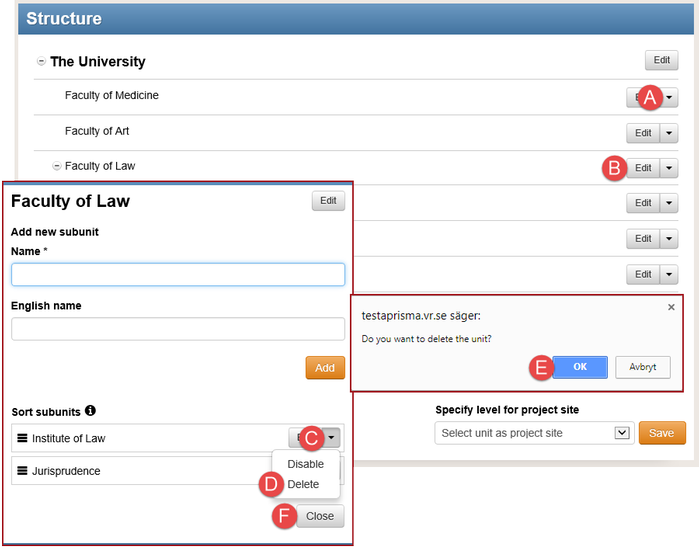
The picture shows how to remove a subunit
You can only remove a unit or a subunit, if there are no applications or tasks in the folder or the subfolder. Remove all applications in the folder or the subfolder, before you remove the unit or the subunit.
- Follow the instructions 1 - 3 in Create the structure for project sites.
- Click on the arrow next to Edit (A) if you want to remove a unit.
Or, if you want to inactivate a subunit: - Click on Edit (B) on the same row as the unit.
- Click on the arrow next to Edit (C).
- Select “Delete” (D) in the drop-down list.
- Click on OK (E) in the message box.
- Click on Close (F).
Specify level for project site for the application form
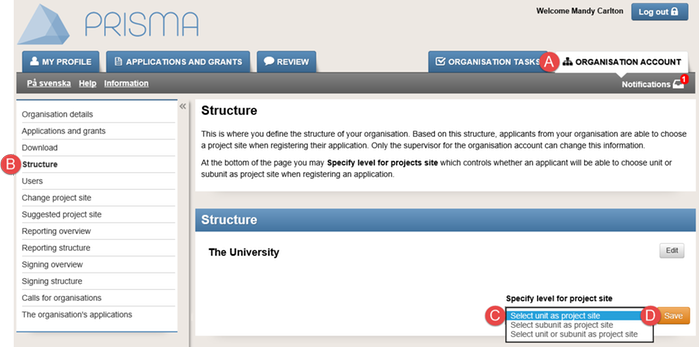
Specify the level of project site that the applicant can select in the application form
You must specify and save the level of the project site. Unless you specify the level of the project site, the applicant cannot select any project site in the application form.
- Log in to your Prisma account.
- Click on the tab ORGANISATION ACCOUNT (A).
- Click on Structure (B).
- Select the level of the project site from the drop-down menu Specify level for project site (C).
- Click on Save (D).
Select unit as project site
Select subunit as project site
Select unit or subunit as project site
The applicant can only select the units of the organisation.
The applicant can only select the subunits of the organisation.
The applicant can select both the units and the subunits of the organisation.
Learn more on how the applicant views the project sites in the application form in Project site.
Updated: