


 Print
Print
- User manual
- » Organisation account
- » Organisation details
Organisation details
If you are the organisation supervisor of the organisation account, you have permission to add and edit the information of the organisation. The organisation details show the funding bodies that have approved your application. You can apply for approval from additional authorities. Basic information of the organisation is mandatory, as well as payment information. You can decide whether the structure of the organisation will reflect the structure for signing and reporting, or not. There are also settings for automatic distribution of signing and reporting tasks.
General information on the organisation account settings
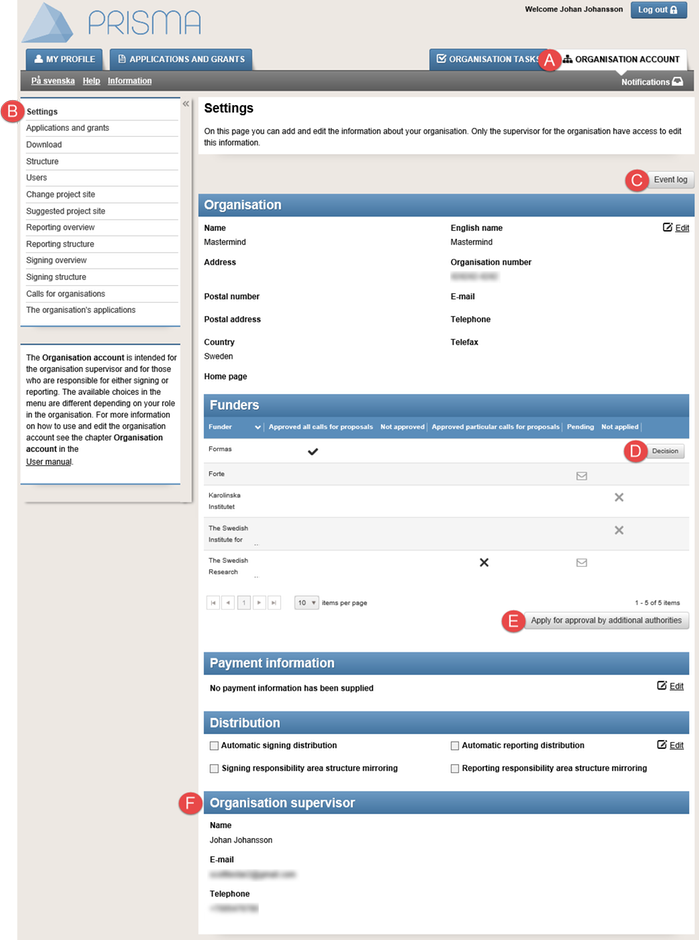
When you log in to the organisation account in Prisma the tab ORGANISATION ACCOUNT shows
The tab ORGANISATION ACCOUNT shows settings and commands for the organisation account.
- Click on the tab ORGANISATION ACCOUNT (A).
- Click on Settings (B).
(C)
(D)
(E)
(F)
The event log shows activities for the organisation account.
You can open the decision document from the authority that approved your application.
You can apply for approval from additional authorities.
Prisma automatically copies the details from the user who is the “Main supervisor” of the organisation account. Normally the “Main supervisor” is the same user who applies for the organisation account.
Enter contact information for the organisation
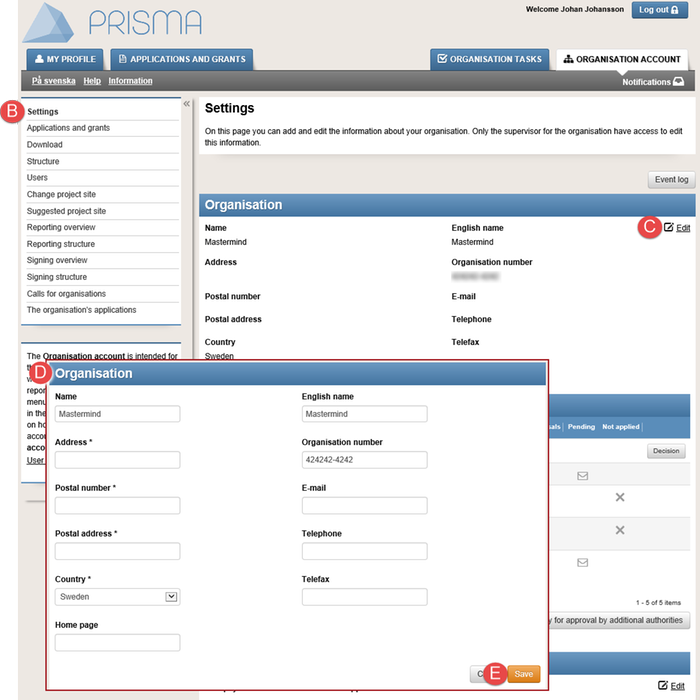
The form for the contact details of the organisation
- Log in to your Prisma account.
- Click on the tab ORGANISATION ACCOUNT (A).
- Click on Settings (B).
- Click on Edit (C) in the section "Organisation".
- Enter the information for the organisation (D).
- Click on Save (E).
Apply for approval by additional authorities
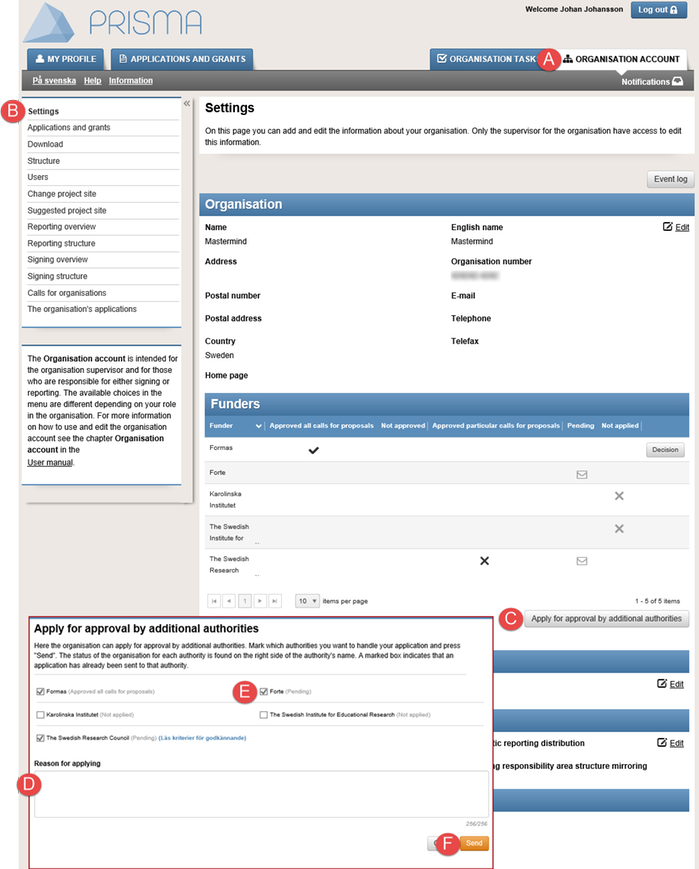
Apply for approval from other authorities
- Log in to your Prisma account.
- Click on the tab ORGANISATION ACCOUNT (A).
- Click on Organisation details (B).
- Click on Apply for approval from other authorities (C) in the section "Funders".
- Tick the check box at the funding bodies or the responsible research body, that you want approval from (D).
- Enter the mandatory information in Reason for applying (E).
- Click on Send (F).
Enter payment information for the organisation
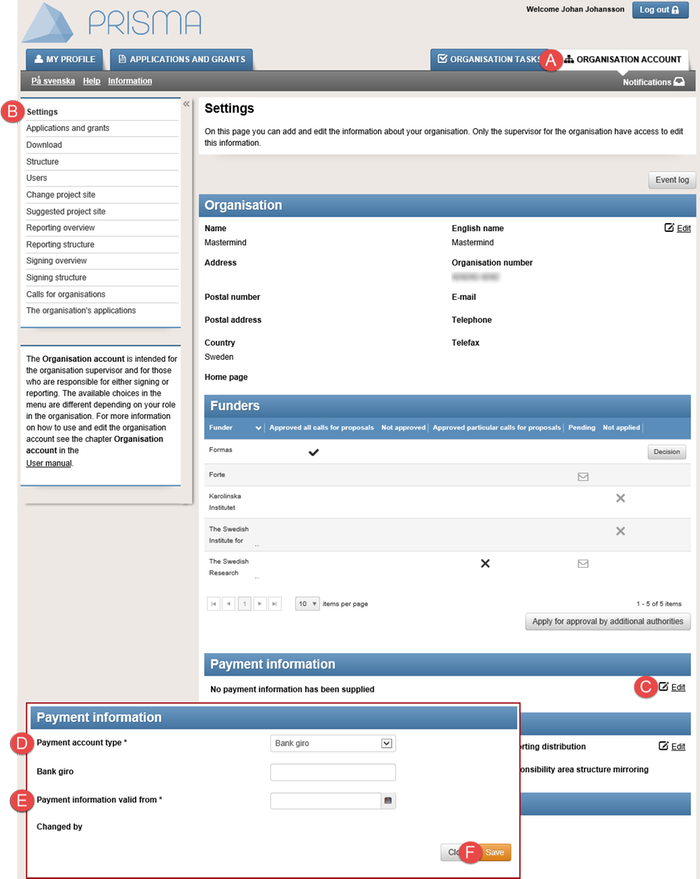
Enter and edit payment information, the payment account type in the example in the picture is "Bank giro"
Various forms show depending on the payment account type, "Bank giro", "Postal giro" or "Bank account".
- Log in to your Prisma account.
- Click on the tab ORGANISATION ACCOUNT (A).
- Click on Settings (B).
- Click on Edit (C) in the section “Payment information”.
- Select Payment account type (D) from the drop-down list.
- Enter the information for the specific payment account type and the date Payment information valid from (E).
- Click on Save (F).
Mirror the organisation structure
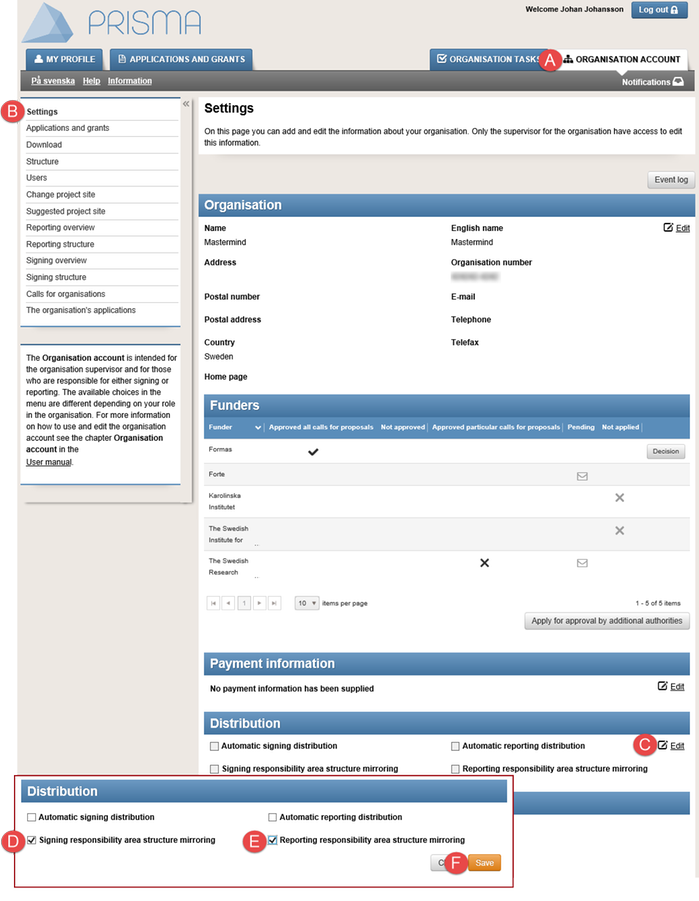
Settings for mirroring the structure of the organisation to the structure of the responsibility areas
If you are the main supervisor, you can choose to mirror the structure of the organisation to the structure of the responsibility areas. The organisation structure copies to the signing responsibility area and the reporting responsibility area, if you choose to mirror the organisation structure.
Inactivated folders, and subfolders, also mirror to the responsibility areas. The inactivated folders, and subfolders, has a symbol of a padlock at the name. You cannot edit a folder, or a subfolder, with the symbol of a padlock.
- Log in to your Prisma account.
- Click on the tab ORGANISATION ACCOUNT (A).
- Click on Settings (B).
- Click on Edit (C) in the section “Distribution”.
- Tick the check box you want to mirror from the organisation structure, Signing responsibility area structure mirroring (D), or Reporting responsibility area structure mirroring (E), or both.
- Click on Save (F).
Settings for distributing tasks
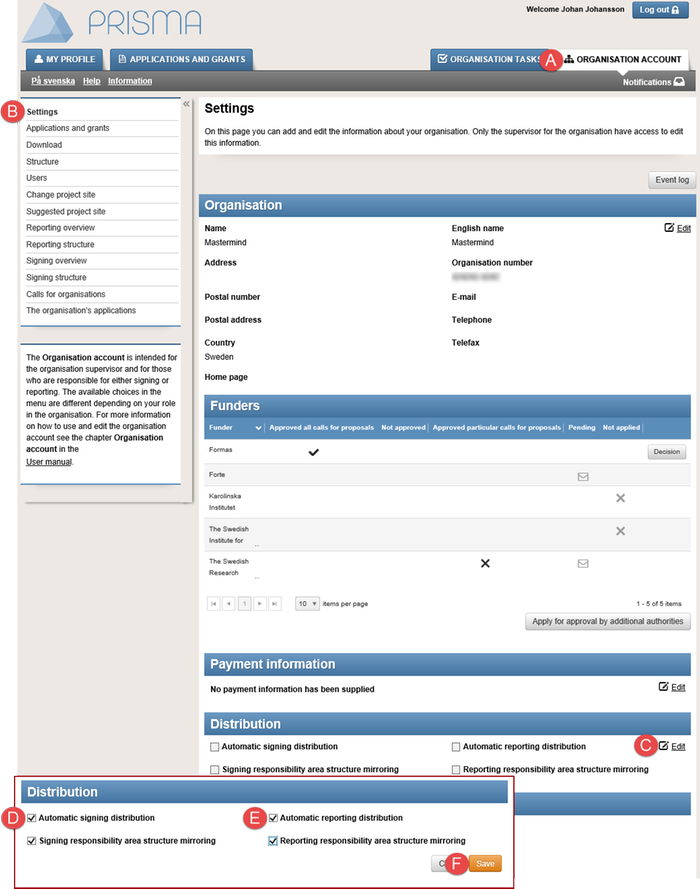
Settings for distributing tasks when you administer applications and grants
If you want the tasks to distribute automatically, you must mirror the organisation structure to the responsibility areas.
- Log in to your Prisma account.
- Click on the tab ORGANISATION ACCOUNT (A).
- Click on Settings (B).
- Click on Edit (C) in the section “Distribution”.
- Tick the check box with the task you want to be distributed automatically, Automatic signing distribution (D), or Automatic reporting distribution (E), or both.
- Click on Save (F).
Learn more on how you add users, for signing and reporting tasks, in Signing and Reporting.
Updated: